Squiggles research computer server: Difference between revisions
No edit summary |
|||
| Line 4: | Line 4: | ||
=== Access Requirements === | === Access Requirements === | ||
==== RCC account ==== | ==== RCC account ==== | ||
To access "Squiggles", users must first have an RCC (Research Computer Server) account. | |||
* | * Request an account at [[https://infoscope.mcw.edu/RCC/Research-Computing-Center.html MCW-Infoscope's Research Computing Center]]. | ||
* If | * If asked, select "others" and then "squiggles" to specify the desired server. | ||
* Follow the | * Follow the provided steps to initiate a new session and gain remote access to Squiggles. | ||
=== How to Access Squiggles === | === How to Access Squiggles === | ||
Revision as of 16:52, 30 August 2023
Introduction
"Squiggles" is a dedicated research computer server for the analysis and storage of MEG, Neurophysiology, and Epilepsy data. Users can connect to it using either the FastX connection (recommended) or the older VNC method. This guide provides detailed steps for both methods.
Access Requirements
RCC account
To access "Squiggles", users must first have an RCC (Research Computer Server) account.
- Request an account at [MCW-Infoscope's Research Computing Center].
- If asked, select "others" and then "squiggles" to specify the desired server.
- Follow the provided steps to initiate a new session and gain remote access to Squiggles.
How to Access Squiggles
VNC Method
Configuration:
- For Windows: Download Putty.
Images for configuration:


- For Mac/Linux: Use a bash shell or terminal.
VNC User Ports:
Users must log in using their designated port numbers. Below is the list of users and their respective ports:
| User | Port |
|---|---|
| Jeff Stout | 5910,5911 |
| Joe Heffernan | 5912 |
| Candida Ustine | 5914 |
| Manoj Raghavan | 5913 |
| Chad Carlson | 5915 |
| Chris Anderson | 5916 |
| Serena Thompson | 5917 |
| Patrick Bauer | 5918 |
| Jeff Binder | 5919 |
| Leo Fernandino | 5920 |
| Lisa Conant | 5921 |
| Aqil Izadysadr | 5922 |
| Nick Guzowski | 5923 |
| Zack Harper | 5924 |
| Bill Gross | 5925 |
| Michelle Kassel | 5926 |
| Greg McQuestion | 5927 |
| Monica Keith | 5928 |
| Priyanka Shah | 5929 |
| Vahab Youssofzadeh | 5931 |
| Songhee Kim | 5935 |
| Cameron J Stewart | 5992 |
Creating a VNC Session:
- VNC sessions are created at bootup using the above port numbers.
- If a session fails, use the command:
vncserver :## -geometry 1900x1200where##corresponds to your port number.
Connecting to a VNC Session:
- Use Realvnc viewer to access your VNC session.
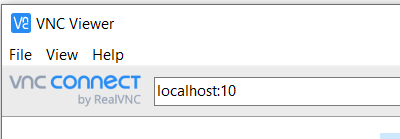
- In the server address bar, type localhost:## where ## are the last two digits of your port number.
- Log in using your VNC and RCC passwords as required.

FastX Method
- FastX may offer a more user-friendly connection than VNC and address issues related to a large number of simultaneous VNC users.
- Download the FastX client and follow these steps:
- Open FastX.
- Click the '+' to initiate a new connection.
- Provide the Connection Name, host (squiggles.rcc.mcw.edu), and user (your RCC username).
- To enter a session, click the '+' and use /etc/X11/xinit/xinitrc as the command.

Common issues & Solutions
- VNC Black Screen: If VNC shows a black screen after login, ensure Anaconda Python is deactivated before creating the VNC session. Use the
conda deactivatecommand in the terminal. - FastX as an Alternative: If you experience persistent issues with VNC, consider using the FastX method described above.
For Mac or Linux
From a bash shell / terminal type the following. This will open a tunnel over ssh to log into VNC Viewer (see below).
/ssh -N -L 59**:localhost:59** squiggles.rcc.mcw.edu
For Windows
An SSH tunnel must be performed using Putty or with windows 10 you can use the ssh command above.
Download Putty: https://www.chiark.greenend.org.uk/~sgtatham/putty/
Logging into VNC session
Once connected to squiggles over ssh
Creating a VNC session
VNC sessions will be created at bootup using the port numbers above
If the VNC session fails or is not working:
vncserver :## -geometry 1900x1200 (This will open a vnc session on port 59## with a resolution of 1900x1200) The ## must match your port number for this to work.
Connecting to a VNC session
Use realvnc viewer to log into your VNC session.
VNC viewer download
Realvnc has been tested to work - https://www.realvnc.com/en/connect/download/viewer/
Log in using RealVNC
Open vncviewer
In the top bar that accepts a VNC Server address
type localhost:## (where ## are the last two digits of your port number 59##)
Log into the VNC session using your VNC password
Once the VNC window is open, log into the server using your RCC password
Killing a VNC session
From the terminal try, vncserver -kill :xx/
For a manual kill (if asked) try,
rm -f /tmp/.Xxx-lock
rm -f /tmp/.X11-unix/Xxx
List of users
From the terminal try,
ls -l /tmp/.X11-unix
Common issues & Solutions
FastX is an alternative to VNC viewer
- Before a VNC session is created, anaconda python must be deactivated. Enter
conda deactivateinto the terminal. If the user does not deactivate anaconda python, VNC will start, but a black screen is shown after logging in.
FastX Connection (alternative connection)
FastX is an alternative to VNC connect. It provides a more straightforward connection than VNC. Previously, we had an issue with a large number of users logging in at once using the VNC. FastX resolves this issue.
The FastX server is installed on squiggles. You will need to download the client - https://www.starnet.com/fastx/current-client
Steps to setup the connection:
1. Open fastX
2. Click the plus to start a new connection
3. Enter the Connection Name, host (squiggles.rcc.mcw.edu), and user (rcc username)
4. Click the plus to enter a session. Use /etc/X11/xinit/xinitrc for the command